Consonance has a two-step royalties process:
1) Calculate royalties
2) Generate statements
This article covers step 2: Generate statements.
Read about step 1: Calculate royalties instead.
What is a royalty statement batch?
It’s a batch of contacts to whom you’re going to send royalty statements, providing details of the sales of their products. You tend to calculate royalties in batches at regular intervals, for multiple contacts, rather than one contact at a time. This page is where those batches are created and managed.
1) Go to the Royalty statements page
Go to Contracts & royalties › Statements ⤴.
Are any royalty statement batches under review?
If there is a royalty statement batch under review, finalise that one first before you start another. Contacts can only be added to one unapproved statement batch at a time. Click on the Approve batch button on the Edit page of the statement batch.
2) Fill in the form
Click the Add button, fill in the form, then click Save. Give the batch a name that is meaningful to you. Click Create when you’ve selected the correct date from the dropdown.
Set up required
The first time you come to this page there are no available statement dates. To set them up, go to Account › Settings › Account › Company settings ⤴ › Company settings and complete the Company Statement Months section.
3) Add contacts
Click on the statement batch’s name to go to the Edit page.
Click on the Actions button to show the available actions:
Click on Add all contacts to add to your statement batch every contract payee.
Alternatively, choose one contact at at time to add.
Contacts who are already part of this or another unapproved batch cannot be added. Such contacts are not be listed in the dropdown.
4) Look at the contact list
When the page reloads, the potential payees are listed, but with no statement yet.
Review the list and click to remove any who you don’t want to receive a statement.
There are a number of things that could be the reason for your contact list not looking as expected:
- Payees already belong to another statement batch. Payees can only be processed in one batch at a time.
- You clicked to add one contact only.
5) Generate statements
Click Actions › Generate statements.
6) Review statements
Click on each row to view and download the numbers.
7) Download the statements
Download them one at a time.
Alternatively, search, choose and download a zipped folder of PDFs.
How do you send the statements?
Download and send from your own email account with your own covering letter to the recipient, or printing and posting. There is no bulk email facility from Consonance.
Royalty statement example
This is an example of a royalty statement layout (without advances). This is the only royalty statement layout available in Consonance: if you want a tailored statement it is a major billable project. The editable data is:
- Logo
- Preamble
- Channel names come from settings
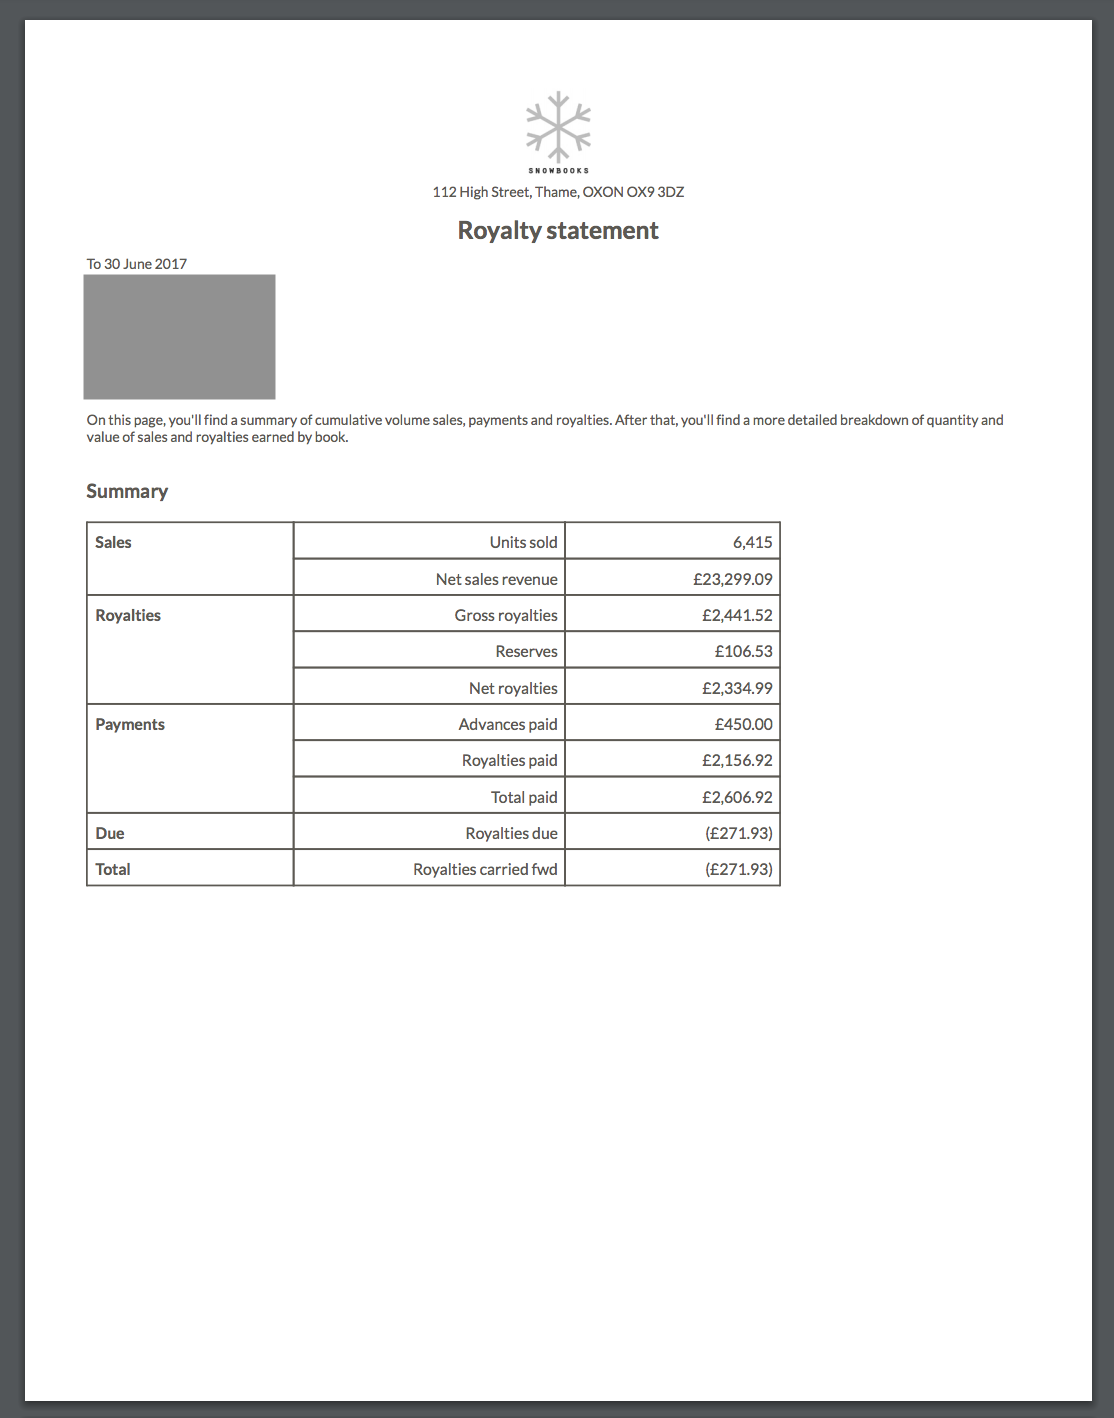
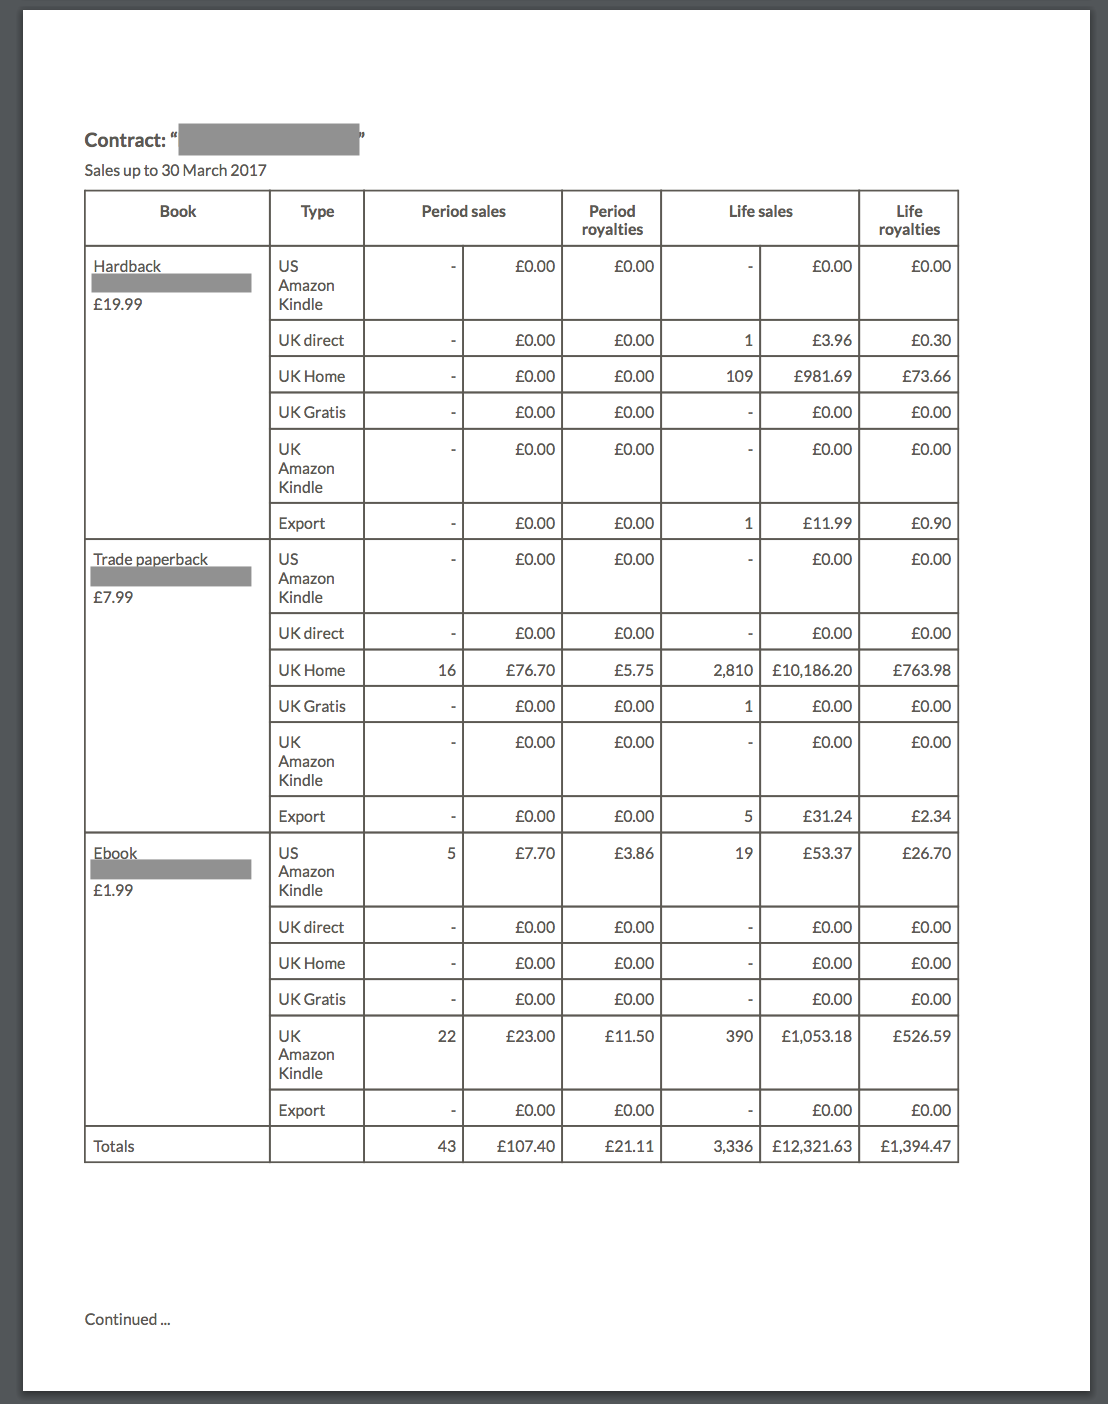
Note that the Royalties carried forward since the last statement
row on the summary sheet details payments held back because of deminimus thresholds. Royalties from previous statements that are unpaid for other reasons will be revealed in the difference between the royalty amount for the period
versus the lifetime
amount. Royalties that appear to the system as unpaid (because there is no matching payment data) will be included in the Total amount payable
in the summary.
Contract sets and royalty statements:
By default, royalty statements will be organised by payee and all works by one payee will appear on the statement.
There is a client configuration to force each work into its own statement and not group by payee, if that is desired. The setting will automatically create a contract set with only that contract included, ensuring that each work will have its own statement.
Separately, if there is a reason for multiple works to appear on one statement, such as to group all works in a series, you can create a contract set.
To create a contract set, Go to Account › Settings › Legal › Contract sets ⤴ and add a contract set. Then, in each contract you want to include in the set, find the Contract Set
dropdown and select the name of the contract set you created.